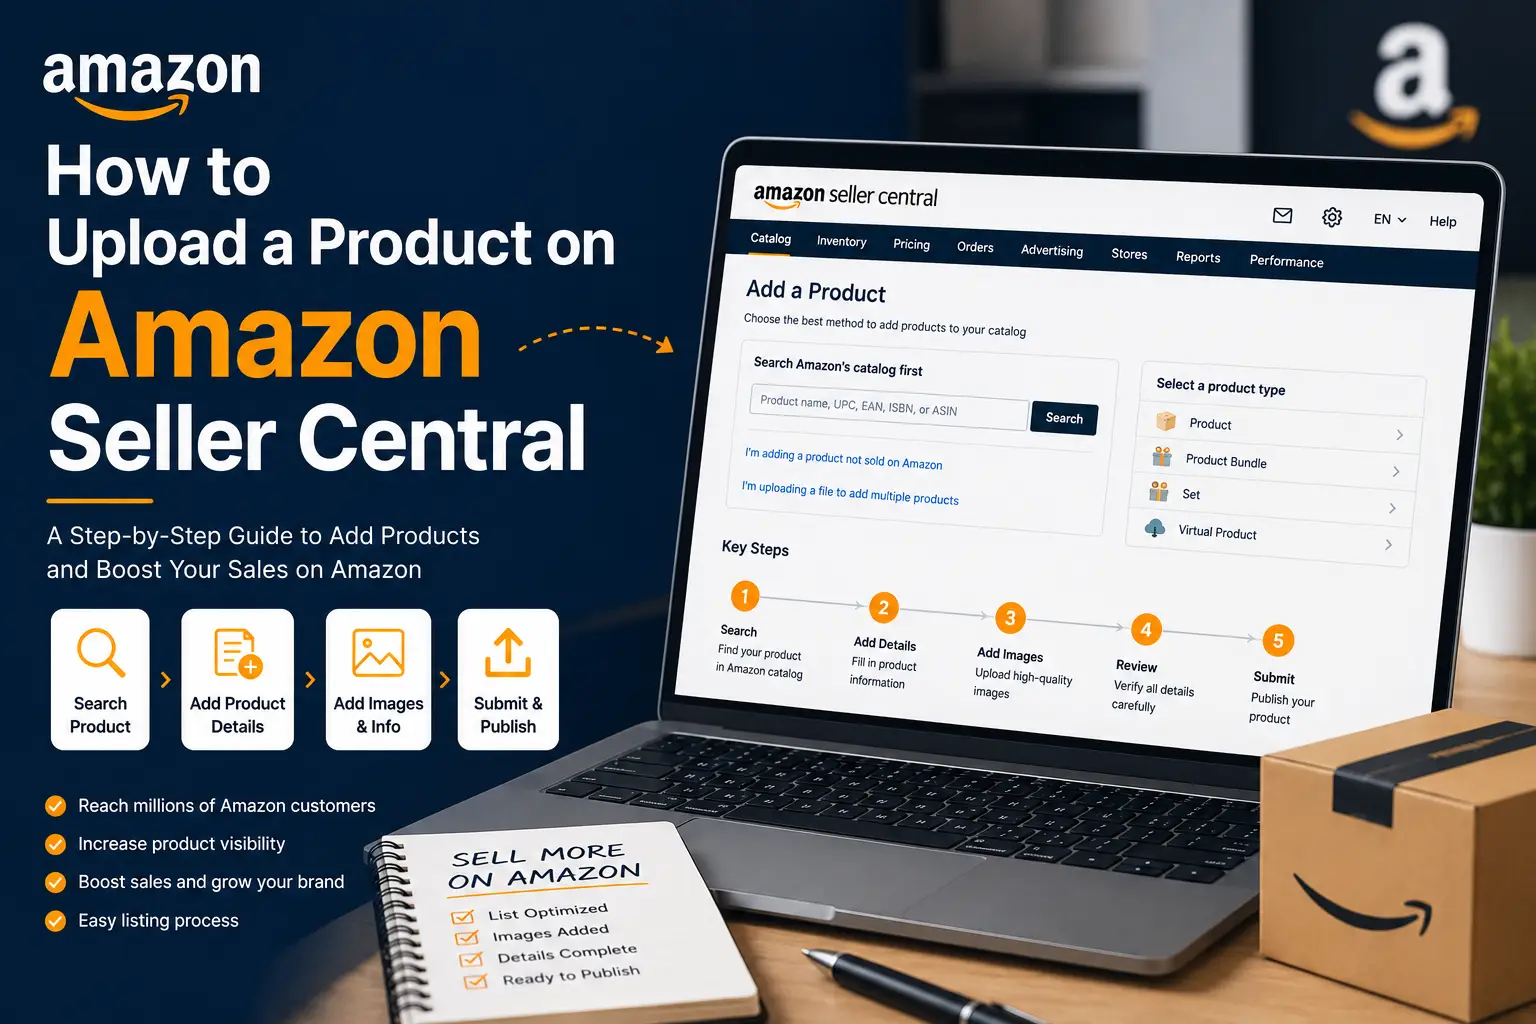
A complete walkthrough from logging in to going live, with everything you need to list your product the right way.
You can have the best product in the world and still make zero sales on Amazon if it is not properly listed. Before any customer can search for, click on, or buy your product, it needs to exist as a live, complete listing on Amazon Seller Central.
In this guide, we will walk you through the full process of uploading a product on Amazon Seller Central, from logging in for the first time to confirming your product is live and visible to buyers..
Table of Contents
- What You Need Before You Start
- How to Navigate to Add a Product
- Existing Listing or New Product: Which Path to Take
- How to Select the Right Category
- How to Fill In the Listing Tabs
- How to Upload Product Images
- How to Save and Submit Your Listing
- How to Verify Your Listing is Live
- Pro Tips for a Stronger Listing
What You Need Before You Start
Jumping into Seller Central without these ready will slow you down mid-process.
- An active Seller Central account (Individual or Professional plan)
- A valid UPC, EAN, or GTIN barcode. If you do not have one, apply for a GTIN exemption first
- Product images with a white background for the main image
- A finished title, bullet points, and product description
- Your selling price, SKU, and stock quantity
- Compliance documents if your category is restricted, such as Health, Beauty, or Electronics
How to Navigate to Add a Product
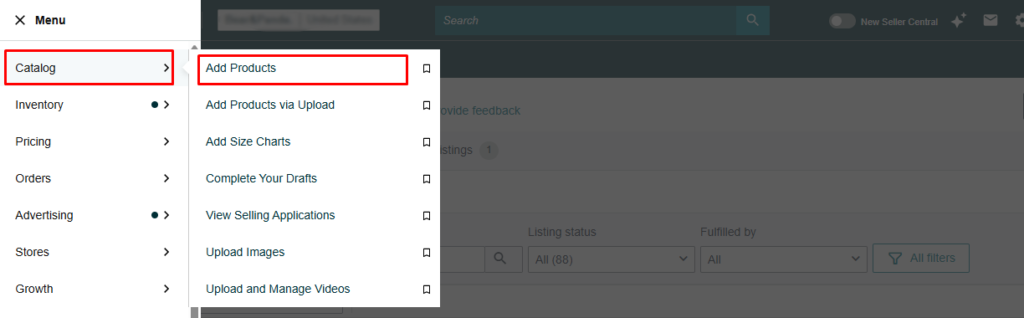
Log in to your Seller Central account at sellercentral.amazon.com. Once you are on the main dashboard, go to:
| Catalog > Add Products |
Existing Listing or New Product: Which Path to Take
Option 1: Sell a product already on Amazon
Search by product name, UPC, EAN, or ASIN. If Amazon finds a match, click “Sell this product” and add your price, quantity, and fulfillment method. You are joining an existing product page, not building a new one.
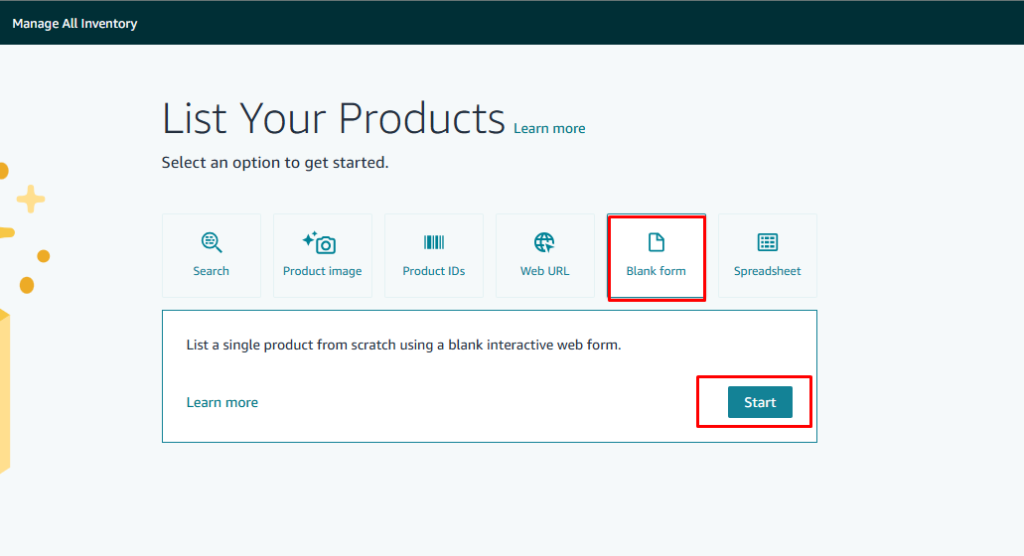
Option 2: Add a product not yet on Amazon
Click “On the Blank form” This opens a blank form where you build the full listing from scratch. This is the path this guide covers.
How to Select the Right Category
Always go as deep into subcategories as possible. Do not stop at a broad top-level category. Amazon will suggest a product type based on what you type, or you can browse the tree manually.
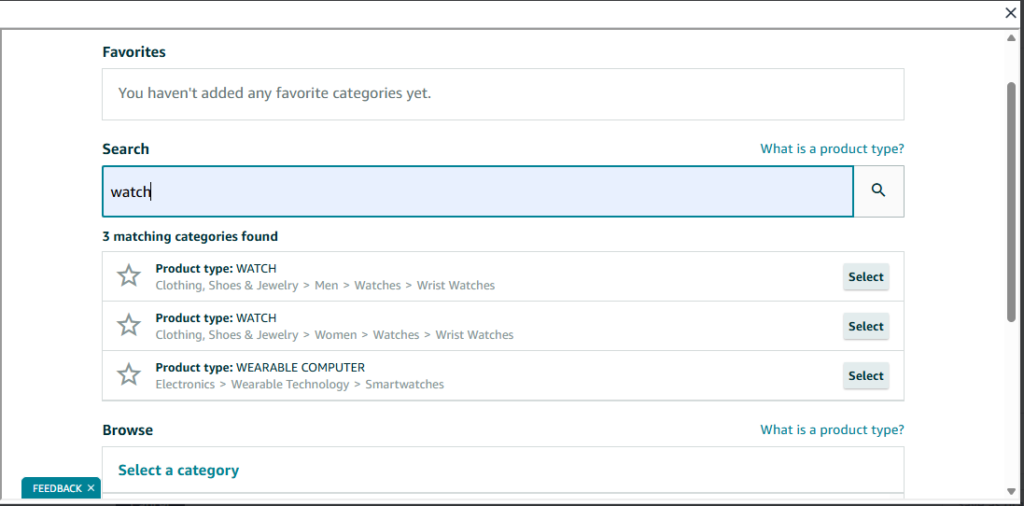
Example: For a leather wristwatch, navigate to Watches > Watches > Wrist Watches. Avoid broad categories like Accessories as they hurt your search visibility.
| Tip: Look up your top competitors on Amazon and check their Best Sellers Rank at the bottom of their product page.It shows exactly which categories they rank in. Use that as your reference. |
How to Fill In the Listing Tabs
After selecting a category, Amazon opens the product form in Advanced View with several tabs. Tabs marked with a red exclamation mark have required fields.
Here is what each tab covers:
- Product Identity: Product name, brand, manufacturer, product ID, and core product details. Required.
- Variations: Size, color, or style options if your product comes in multiple versions.
- Offer: SKU, price, sale price, quantity, and fulfillment channel. Required.
- Images: Main image and up to 8 additional images. Required.
- Keywords: Backend search terms for Amazon SEO
- Description: Product description and bullet points.
- More Details: Category-specific attributes, weight, dimensions, and safety data.
- Compliance: Battery details, regulatory information, and product warnings.
Product Identity Tab
- Product Name (Title): Lead with your most important keyword. Up to 200 characters. No all caps, symbols, or phrases like “Best Seller.”
- Brand Name: Must match exactly what is on your product and your Brand Registry name if you are enrolled.
- Product ID: Your UPC, EAN, or GTIN barcode. No barcode means no listing without a GTIN exemption.
- Manufacturer: Enter your company name if you sell your own brand.
Offer Tab
- SKU: Your internal tracking code. Customers never see this.
- Price: Your selling price.
- Sale Price and Date Range: Optional. Setting this may trigger Amazon’s “Limited Time Deal” badge.
- Quantity: Units available to sell.
- Fulfillment Channel: FBA (Amazon ships) or FBM (you ship).
FBA vs FBM
With FBA, Amazon handles storage, packing, shipping, and customer service. Your product gets the Prime badge, which improves conversion rates significantly. With FBM, you handle fulfillment yourself, giving you more cost control but no Prime badge unless you qualify for Seller Fulfilled Prime. For new sellers, FBA is generally the better starting point.
Description Tab
- Bullet Points: Up to 10 allowed. Lead with the customer benefit, then explain the feature. Be specific. If a bullet could apply to any product in your category, it is not specific enough.
- Product Description: Covers use cases and extra details. If you are Brand Registered, A+ Content will replace this section visually on your product page.
How to Upload Product Images
Amazon allows up to 9 images per listing. Your images are the only way customers can evaluate a product they cannot physically touch.
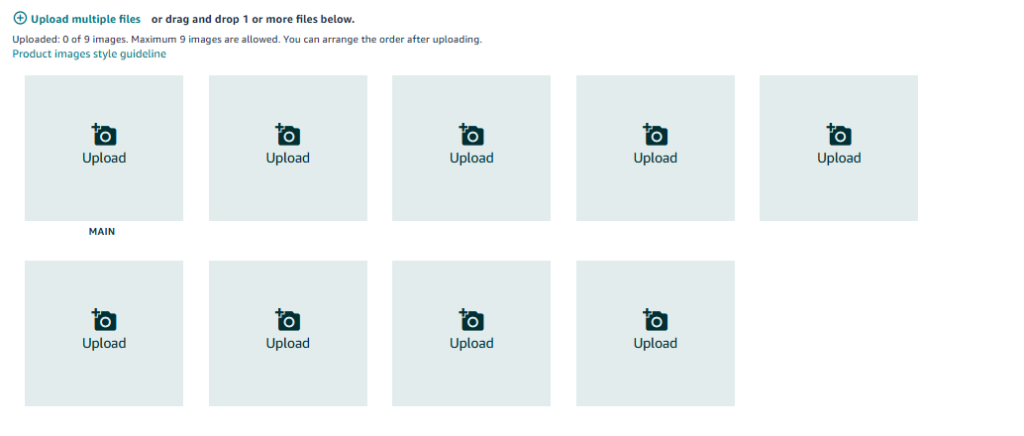
Image requirements:
- Minimum 500px on the longest side. At least 1600px recommended to enable zoom.
- Accepted formats: JPEG, PNG, TIFF.
- Main image must have a pure white background (RGB 255, 255, 255).
- The product must fill at least 85% of the frame.
- No watermarks, text, logos, or borders on the main image.
How to use your remaining image slots:
- Multiple angles: front, back, side, and top
- Lifestyle image showing the product in use
- Close-ups highlighting material or key features
- Infographic with labels pointing to product features
- Size comparison image next to a familiar object
How to Save and Submit Your Listing
Once all required tabs are complete with no red exclamation marks, click Save and Finish at the bottom of the page.
- Your listing data is uploaded to Amazon’s servers. This takes a few seconds.
- Amazon’s systems check your content against catalog policies: images, title guidelines, compliance data.
- If everything passes, you will see a confirmation screen that your listing has been created.
How to Verify Your Listing is Live
- Go to Inventory > Manage All Inventory and search for your SKU. It should show a status of “Active.”
- If the status shows “Inactive” or “Suppressed,” hover over it to see what needs to be fixed.
- Click the product title to open the live product page on Amazon and review everything as a customer would see it.
Pro Tips for a Stronger Listing
Write your title for search and readability
Put your most important keyword first. Then add brand name, key features, size, color, or quantity. A keyword-stuffed title that is hard to read hurts click-through rates.
Use A+ Content if you are Brand Registered
A+ Content replaces your plain description with rich visuals and comparison charts. It improves conversion rates and gives Amazon’s AI more content to work with when recommending your product.
Do not skip the More Details tab
Attributes like material, weight, and dimensions improve how Amazon matches your listing to specific searches and reduce returns from incorrect expectations.
Avoid promotional language
Phrases like “Best on Amazon,” “Free Shipping,” or “#1 Choice” violate Amazon’s listing policies and will get your listing suppressed.
Optimize for Amazon Rufus
Rufus, Amazon’s AI shopping assistant, reads your title, bullets, A+ Content, reviews, and Q&A to decide whether your product answers a shopper’s question. Write your content to answer real customer questions, not just to place keywords. A listing that explains who the product is for and what problem it solves will consistently outperform one that only stacks search terms.