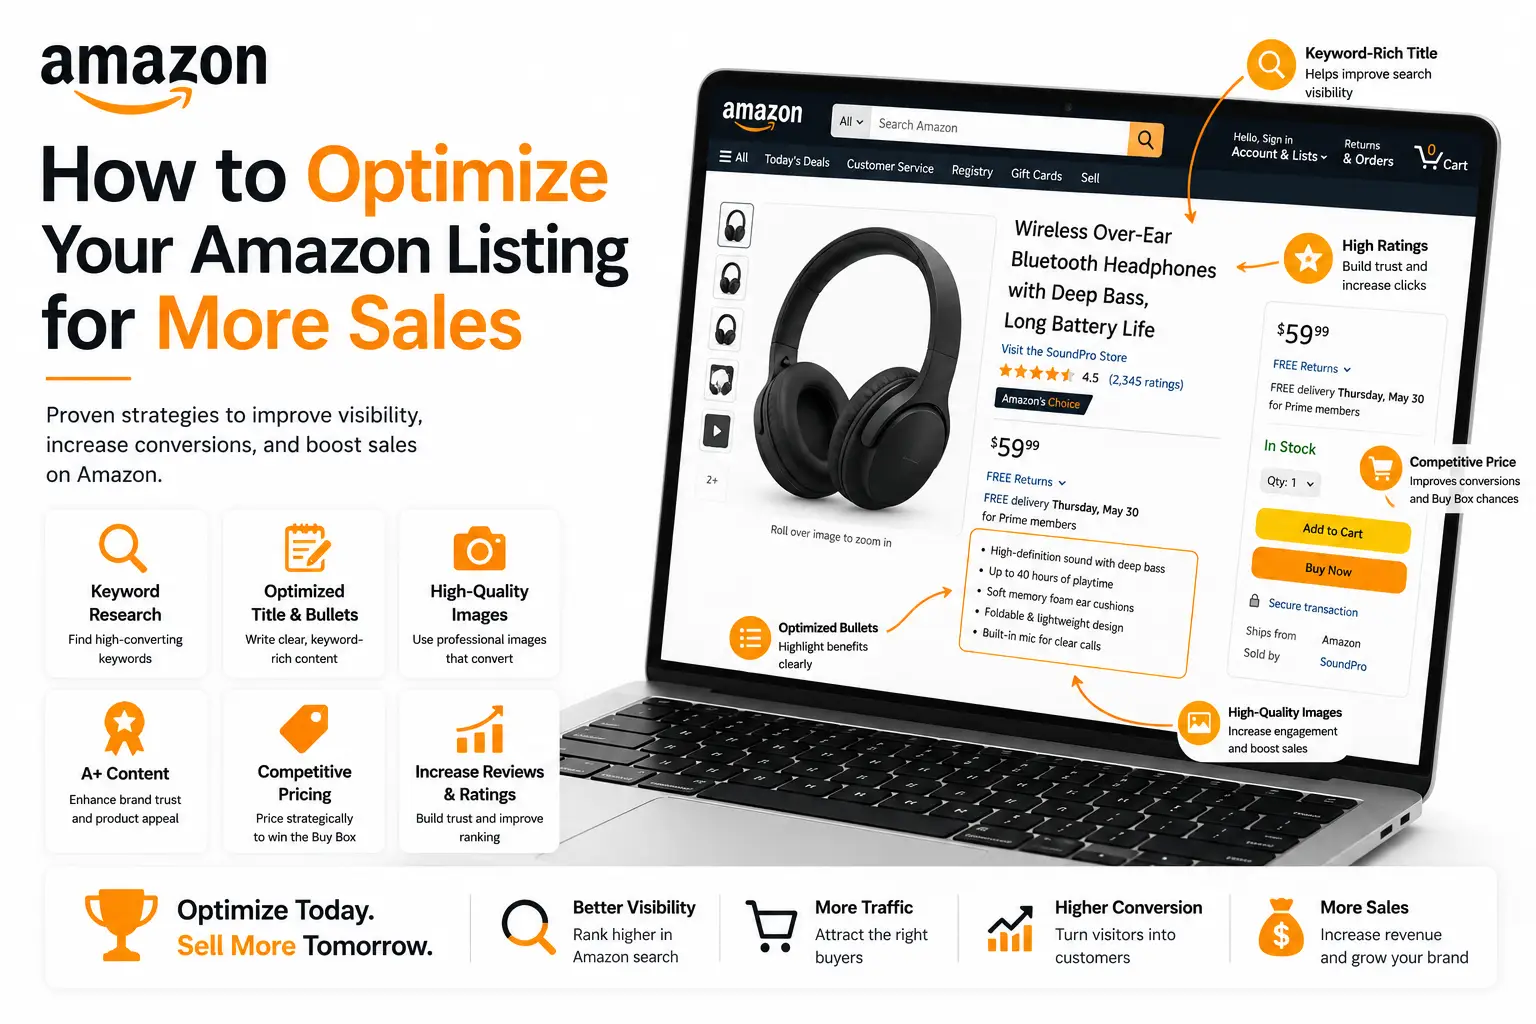
Your Amazon listing is doing two jobs at the same time. It needs to convince Amazon’s algorithm to show your product to the right shoppers, and it needs to convince those shoppers to click and buy. Getting either wrong costs you visibility and revenue.
This guide covers every major element of listing optimization in 2026, including updated character limits, what Amazon’s AI assistant Rufus now looks for, and a checklist you can use on any listing.
Table of Contents
- Why Listing Optimization Matters
- Step 1: Keyword Research
- Step 2: Product Title
- Step 3: Bullet Points
- Step 4: Product Description and A+ Content
- Step 5: Backend Keywords
- Step 6: Product Images
- Step 7: Pricing
- Step 8: Reviews and Q&A
- Step 9: Optimize for Amazon Rufus
Why Listing Optimization Matters
Amazon’s search algorithm, known internally as A10, ranks products based on a combination of relevance and performance signals. Relevance comes from how well your listing matches what a shopper is searching for. Performance comes from your sales history, click-through rate, conversion rate, and reviews.
A well-optimized listing improves both. Strong keywords improve relevance. Clear copy and good images improve conversion, which over time improves your performance signals. The two reinforce each other, which is why a listing that starts strong tends to compound its advantage over time.
Step 1: Keyword Research
Keyword research is the foundation of everything else. Before you write a single word of your listing, you need to know which search terms your target customers are actually using.
Where to find keywords
- Amazon search autocomplete: Type your product name into Amazon’s search bar and note the suggestions. These are real, high-volume terms Amazon surfaces based on customer behavior.
- Competitor listings: Open the top three to five competing products in your category. Read their titles and bullet points carefully and note which keywords appear repeatedly.
- Amazon Product Opportunity Explorer: Available in Seller Central, this tool shows trending search terms, demand levels, and competition within specific niches.
- Keyword research tools: Helium 10 Magnet, Jungle Scout Keyword Scout, and DataDive pull keyword data directly from Amazon’s search index and show monthly search volume estimates.
How to organize your keywords
Once you have a list, group them by priority. Your primary keyword is the single most relevant, highest-volume term for your product. Secondary keywords are closely related variants. Long-tail keywords are more specific phrases with lower volume but often higher purchase intent.
Primary and secondary keywords go into your title and bullet points. Long-tail and supporting terms go into your backend keyword fields. Do not repeat the same keyword across multiple fields. Amazon already indexes your title, bullets, and description, so repeating keywords in the backend wastes your 250-byte limit.
Step 2: Product Title
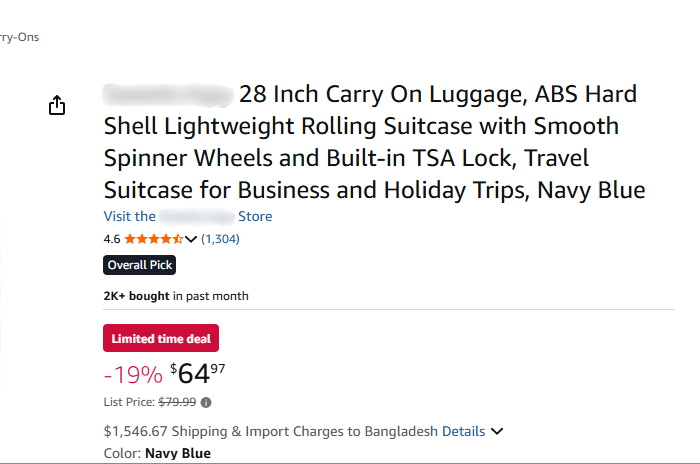
Your title is the most important field for both search ranking and click-through rate. Amazon weights earlier keyword placement more heavily, and mobile search results truncate titles at around 70 to 80 characters, so your primary value proposition needs to land early.
Title character limits
Amazon enforces a 200-character maximum including spaces for most product categories. Some categories are stricter. Apparel caps at 125 characters. Many electronics categories cap around 150 characters. Check your category’s style guide in Seller Central before writing your title.
Title structure
The most reliable title formula for most categories is:
| Brand + Product Type + Key Features (size, color, quantity, material) + Differentiator |
Title rules
- Put your primary keyword in the first three to five words of the title. Amazon weights earlier placement more heavily, and mobile truncation means keywords buried at position six or later may never be seen.
- Do not use all caps. Capitalize the first letter of each major word only.
- Do not include promotional language such as Best Seller, Free Shipping, or Guaranteed.
- Do not use special characters like !, $, or * as these can trigger listing suppression.
- Do not repeat your brand name more than once in the title.
Step 3: Bullet Points
Bullet points are the second most important field in your listing. Most shoppers read the title and bullets before anything else. They do not read descriptions. A strong set of bullets can be the difference between a click that converts and one that bounces.
Character limits
Amazon allows up to five bullet points for most seller accounts. Each bullet should stay under 255 characters. Amazon indexes the first 1,000 characters of bullet points total, so five bullets at 200 characters each ensures your entire content is indexed.
How to structure each bullet
Lead every bullet with a customer benefit, not a product feature. Features describe what the product is. Benefits explain what the customer gets from it. The customer is always asking: what does this do for me?
After the benefit, back it up with the specific feature that delivers it. Include a relevant keyword naturally within the bullet. Do not force keywords in awkward positions.
What each bullet should cover
- Bullet 1: Your primary product benefit and main use case. This is what most customers are buying it for.
- Bullet 2: Material quality, build, durability, or a key technical specification that differentiates your product.
- Bullet 3: Compatibility, size options, or versatility. Addresses the common question of whether this product works for the customer’s specific situation.
- Bullet 4: A feature that addresses a common objection or concern. Look at negative reviews on competitor listings to find what shoppers worry about and answer it directly.
- Bullet 5: Warranty, customer support, satisfaction guarantee, or any brand trust signal.
Step 4: Product Description and A+ Content
Standard product description
Up to 2,000 characters. Located below the fold on desktop, so fewer shoppers reach it. Still worth writing well because it is indexed for search and read by Amazon Rufus. Use it to expand on your bullets with use cases, care instructions, or compatibility details a thorough buyer might want.
A+ Content for Brand Registered sellers
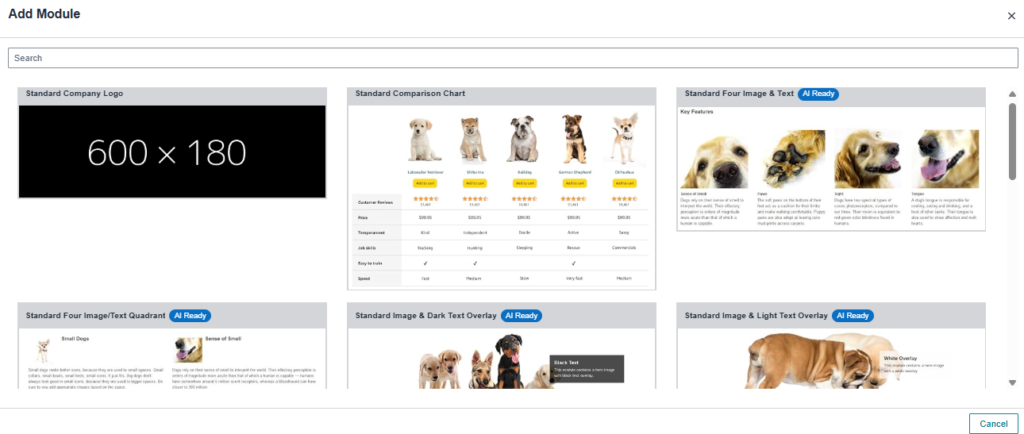
If you are enrolled in Amazon Brand Registry, you can replace the standard description with A+ Content, which is a significant upgrade. A+ Content lets you add rich imagery, comparison charts, lifestyle photos with text overlay, FAQ sections, and brand story modules.
A+ Content consistently improves conversion rates because it gives shoppers a much richer product experience than plain text. It also gives Amazon’s AI more structured content to work with when deciding whether your product is relevant to a shopper’s query.
| Premium A+ Content, available to Brand Registered sellers who meet Amazon’s eligibility criteria, adds video modules and interactive hotspot images.Listings with A+ Content see an average 3 to 10% conversion rate improvement according to Amazon’s own data. |
Step 5: Backend Keywords
Backend keywords are invisible to shoppers but indexed by Amazon’s algorithm. This is where you add relevant terms that do not fit naturally in your visible content.
The 250-byte limit
The Subject Keywords field accepts up to 250 bytes. For standard letters and numbers, one character equals one byte. Symbols and special characters count as two bytes each. If you exceed 250 bytes, Amazon ignores the entire field, not just the excess.
Backend keyword best practices
- Separate terms with spaces only. Do not use commas. Commas count toward your byte limit without helping.
- Do not repeat keywords already in your title, bullets, or description. Those are already indexed.
- Include common misspellings and alternate spellings of your product name.
- Include synonyms and related terms your target customer might use.
- Use the Target Audience, Intended Use, and Subject Matter fields to add additional keyword signals without eating into your 250-byte main field.
Step 6: Product Images
Images are the first thing a shopper sees in search results and the primary driver of click-through rate. Before a shopper reads your title or bullets, they have already judged your listing by its main image.
Main image requirements
- Pure white background (RGB 255, 255, 255)
- Product must fill at least 85% of the image frame
- Minimum 500px on the longest side. At least 1600px to enable the zoom feature.
- No watermarks, text, logos, or props on the main image
Additional images: how to use all 9 slots
- Angles: front, back, side, and top views
- Lifestyle: show the product in use in a real setting with real people
- Scale: a size comparison image next to a familiar object
- Detail: close-ups of material, texture, stitching, or key components
- Infographic: call out specific features with text labels and arrows
- Packaging: show how it arrives, especially useful for gift items
| Mobile search results show only the main image and title for most products.A poor main image loses the click before a shopper ever reads your listing. |
Step 7: Pricing
Price is one of the strongest signals in Amazon’s Buy Box algorithm and one of the first things a shopper compares when choosing between similar products. Getting your price right is not just about margin. It directly affects your visibility.
Research what your top competitors charge for equivalent products. Your price does not need to be the lowest in the category, but it needs to be defensible. A price significantly higher than comparable products needs to be justified by something visible in your listing: better images, stronger reviews, clearer benefits, or a notable feature difference.
If you use FBA, factor in fulfillment fees, storage costs, and Amazon’s referral fee when calculating your break-even price. Many sellers price too low without accounting for all costs, which leads to thin or negative margins at scale.
| Use the sale price and date range fields in Seller Central to create limited-time pricing.A visible strike-through price next to your sale price can increase conversion rates significantly. |
Step 8: Reviews and Q&A
Reviews are the strongest trust signal on Amazon. A product with 500 reviews at 4.3 stars will typically outsell one with 20 reviews at 4.8 stars because volume signals legitimacy.
- Use Amazon’s Request a Review program to send automated post-purchase review requests. This is the only approved direct method.
- Use the Vine program if you are Brand Registered and have fewer than 30 reviews.
- Read your one and two-star reviews regularly. They are the clearest signal of what needs to improve in your product or listing.
Step 9: Optimize for Amazon Rufus
Rufus is Amazon’s AI shopping assistant. Shoppers ask it conversational questions and it recommends products based on its reading of listing content, reviews, and Q&A. Amazon reports that Rufus-assisted shoppers convert at around 60% higher rates than those who do not use it.
Rufus does not rank by keyword density. It reads your listing the way a customer would, looking for clear answers to: What is this for? Who is it best for? Does it solve my specific problem?
How to optimize for Rufus
- Write your title and bullets to answer real customer questions, not just to contain keywords. Think about what someone would say out loud when asking for a product recommendation.
- Include use-case language throughout your listing: who uses it, when they use it, and what problem it solves. This is the primary language Rufus draws from.
- Complete every attribute field in your listing, including material, dimensions, compatibility, and target audience. Rufus uses structured attribute data to match products to specific queries.
- Answer questions in your Q&A section thoroughly. Rufus reads Q&A content as part of its product evaluation.
- Encourage detailed reviews. Rufus reads review content and uses it to assess whether your product actually delivers on what the listing promises.
| A listing can rank well in keyword search and still be absent from Rufus recommendations.As Rufus usage grows, optimizing for it is becoming as important as traditional SEO. |
Listing optimization is not a one-time task. Amazon’s algorithm evolves, competitors improve their listings, and new features like Rufus change what drives visibility and conversion. Treat your listings as living assets and audit them regularly, especially if a listing that was performing well starts to decline.
Have questions about optimizing a specific type of product or improving a listing that is already live? Leave a comment below.